
GoFullPage is the fastest, most fool-proof way of taking a screenshot of an entire webpage. Though the extension takes screenshots at a single click of a button, we aim to make it even easier and quicker to get what you need when it comes to saving, downloads, and default preferences!
Less time wasted on busywork, more time for you and your goals—let’s jump in to these 4 quick tips ⬇️
Options on the free browser extension
For anyone using the free browser extension, make sure you’ve looked through the GoFullPage “Options” page to ensure you’re customizing and optimizing your GoFullPage experience according to your needs.

Here are the first two ways to set an automation in your GoFullPage flow from within our “Options”:
1. Directory
This feature allows you to specify a default directory (within your downloads folder) for GoFullPage to automatically save your screenshots. The example screenshot below has the folder name as: “GoFullPage”. If this section is left blank, the download directory defaults to the default system downloads folder. This entry can only accept letters, numbers, dashes, underscores, and slashes—invalid characters will automatically be removed.

As a note, the downloads directory cannot be specified outside of the downloads folder on your computer. This is due to privacy limitations placed on extensions by the browser.
2. Auto-download files
This feature will configure GoFullPage to automatically download your screenshot to your computer as an image, instead of opening it in a new window.

Activating this feature means that the extension capture tab will not open. You will be able to return back to the “Options” page by right-clicking on the extension icon and selecting “Options”.
For automating premium features
Our premium subscription unlocks access to the Premium Editor and its additional features such as screenshot annotating, editing, and formatting. If you want to make the same edits repeatedly to your screenshots, we have several features to automate your workflow so that you aren’t applying the same defaults repeatedly.
3. Options page: Smart page splitting, Add URL and date/time
For this feature, you can visit the “Options” page once more:
In the “Options” page, there are several features with a small lightning bolt icon (⚡) next to them. This icon indicates these features require the premium subscription:
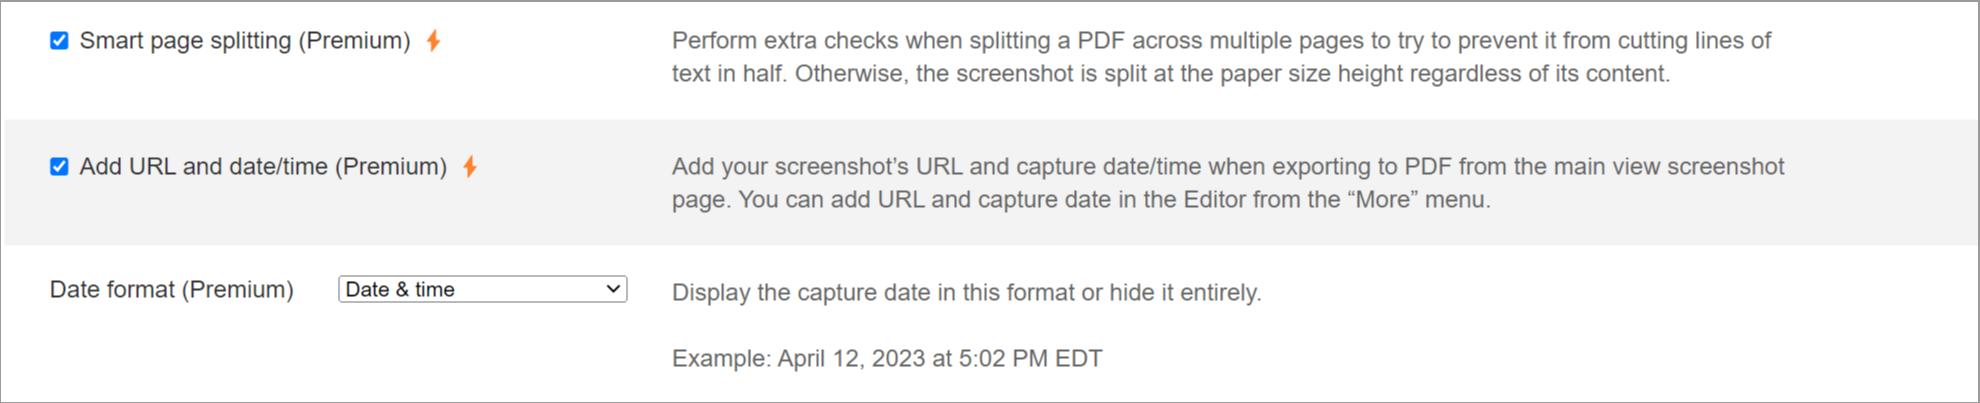
Smart page splitting will automatically perform extra checks when splitting a PDF across multiple pages, in order to prevent it from cutting lines of text in half. Otherwise, the screenshot is split at the paper size height regardless of its content. If you enable this feature, these checks will occur automatically for all future screenshots saved to PDF! Set it, and forget it ✅
If you enable the “Add URL and date/time” feature, your screenshot’s URL and capture date/time will automatically be added when exporting to PDF. If you know you will always want the URL and a certain format of datestamp or timestamp, there’s no need to visit the Premium editor to add this formatting on each screenshot. This feature allows this setting to be applied automatically to all PDFs you save.
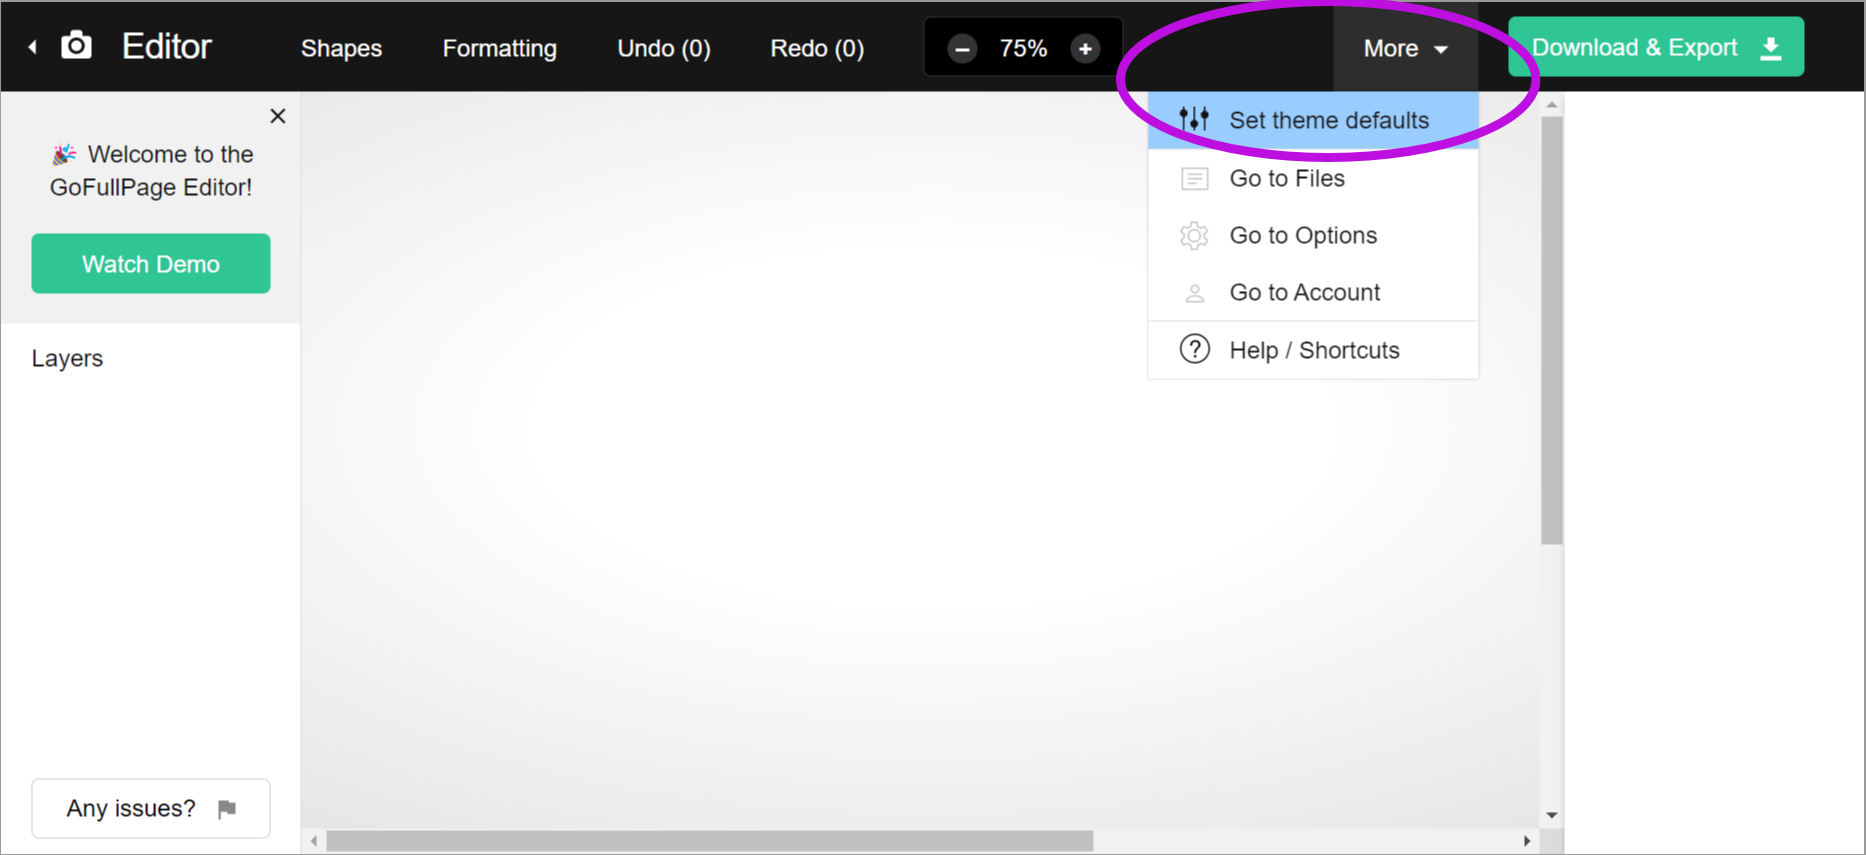
4. Premium editor: Set theme defaults
For the last way you can automate your way through GoFullPage, you can visit the Premium editor:

If there is a specific way you often find yourself adding annotations, edits, and formatting, you can visit the “More” menu, and click on “Set theme defaults”:

“Set theme defaults” allows you to customize defaults for color, width, and fill for your shapes (rectangle, oval, line, arrow, text, and blur) and formatting (padding/border and URL/date).
For example, if you often find yourself using the Editor to white out sections of a screenshot, you can default the fill and color of the outline of the Rectangle to white:
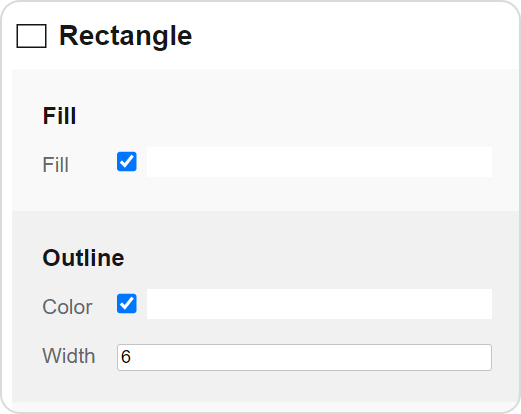
With this default, every time the Rectangle shape is opened, it will appear as a white rectangle. You would then be able to manipulate the height and width of the rectangle, so it covers the part of the screenshot you’d like to white-out.
Alternatively, if you find yourself frequently using the Rectangle as a highlighter over text, you can remove the outline and default the fill to a yellow color, with 30% transparency:
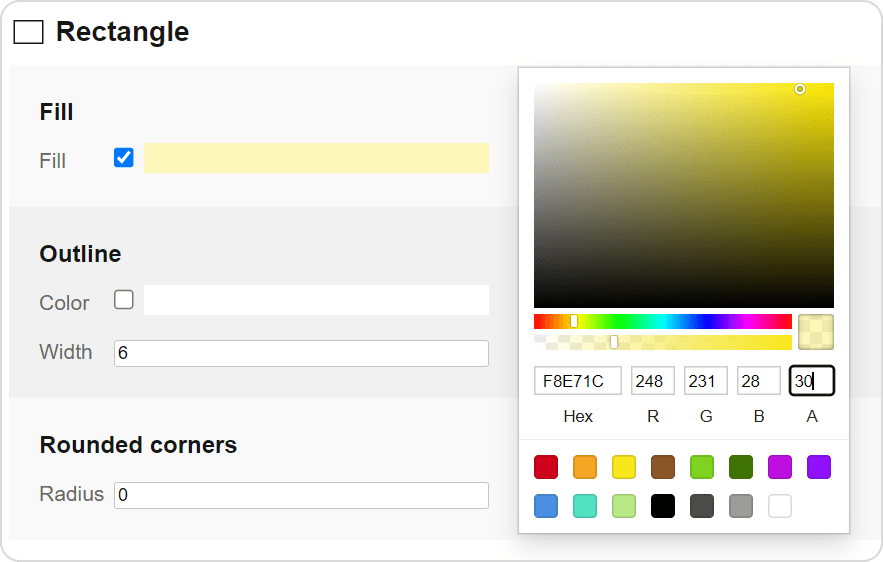
Now, every time the Rectangle shape is selected in the Premium Editor, it will open as a highlighter!
Lastly, if you often use the GoFullPage Premium Editor to redact sensitive information from a screenshot, you can set Line to default to the color red:

Once this default is set, the Line shape will always open as a red line, and can be used to redact sensitive information.
These three examples show all the ways you can automate theme defaults for your screenshot editing, so that the same defaults show up every time you visit the Editor!
For both free and premium users, this post showed you four ways you can simplify, automate, and customize your GoFullPage experience to make your screenshotting processes even more efficient! Happy automating 📸!
Helpful links
To download our free app: GoFullPage for Google Chrome or Microsoft Edge
To use our premium tools: GoFullPage Premium
